Make & Do Projects
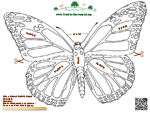
Make a Monarch Butterly Puppet

Print the Monarch Puppet outline and color it in with your choice of colors.
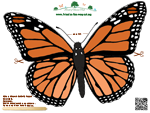
Print the realistic Monarch Puppet form.
Make a Seed Germinator
Start this project between mid-February and the end of March.

Materials
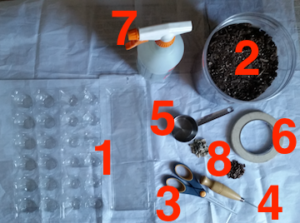
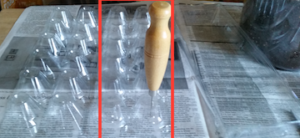
- Trifold clear plastic egg carton.
- Potting soil
- Scissor to separate tray.
- Awl to punch holes for drainage.
- Small scoop to shovel potting soil.
- Labels
- Water Dispenser
- Seeds
- Indelible pen (not shown).
Steps 1 – 10.
1.
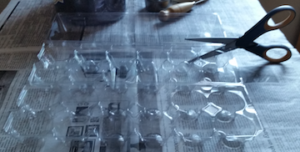
Cut off the tray-like section of the trifold egg carton.
2.
Using an Awl or a scissor, punch a small hole in the bottom of each of the 12 egg compartments.
3.
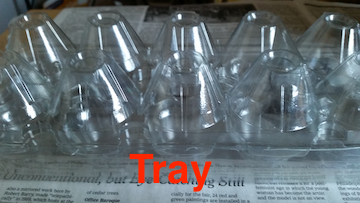
Place the connected two-piece egg carton puncture side down into the tray. The puncture at the bottom of each compartment allows water to seep upward into the soil at a slow even rate.
4.

Scoop out a small portion of potting soil.
5.
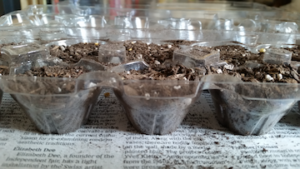
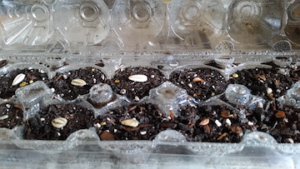
Fill each seed compartment with soil. Allow the compartment separators to show.
6.
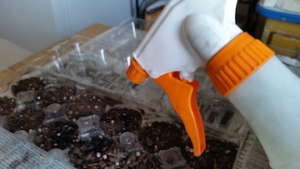
Using a water sprayer dampen the soil. Don’t saturate the soil.
7.
Fill the tray ⅓ full of water and place the earth-filled side into the tray. Place 1 seed on top of the dampened soil of each compartment.
8.
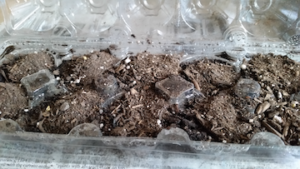
Cover the seeds with a ⅓” – ½” inch of soil. Spray to dampen the covering soil. Avoid making puddles of water.
9.
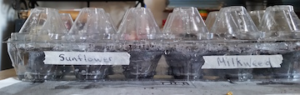
Close the lid on the Seed Germinator. Write the name of the seeds on a label and place the label on your seed germinator. It is good practice to add the date of planting. I planted my sunflower and milkweed seeds on March 12, 2016. Be patient! It may take from 2 to 4 weeks for your seeds to sprout. The root will grow first. Then the green sprout (seedling) will push upward out of the soil toward the light. The seedlings can be transplanted to your outdoor garden, window box, or container when all danger of frost has passed. In New York it is usually safe to plant seeds and transplant seedlings outdoors after mid-April when the chance of a frost (the temperature dips below freezing, 32℉) has passed.
Watering! Fill the tray with water just above the punctures. Keep water in the tray to ensure that the seed detects a nourishing environment. Don’t water the soil directly. Overwatering can drown the seedlings and prevent seeds from germinating.
10.
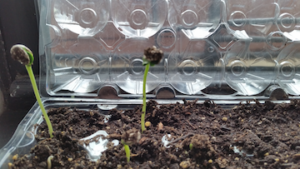
By March 20, 2016, four of the Sunflower seedlings had sprouted. They are still wearing their seed shell. These will fall off as the seedling grows. Milkweed seeds take more time to germinate. Be patient. Once the seeds have sprouted open the germinator to allow moisture to evaporate. If the environment is too wet the seedlings may drown.
Download Make a Seed Germinator and get a head start on spring planting. Remember this is a great cold-weather project from mid-February through the end of March. Remember to check the Frost Date before putting seedlings outdoors.
Make an Indoor Red Wiggler Worm Bin
This shoe size worm bin will fit comfortably in most New York City apartments. Recycle your fruit & vegetable scraps and watch the Red Wigglers make a rich compost for your house plants, window boxes, garden beds and tree pits.
Wormy Information:
Healthy red wiggler worm bins do not have a foul odor. Vermicompost has a earthy, rich fragrance, similar to healthy garden soil or a forest floor. Use the vermicompost to nourish your house and garden plants, and the street trees on your block. This petite Red Wiggler composting system can take in up to five (5) pounds of food scraps each week producing 10-15 gallons of vermicompost per year. To accomplish this Red Wigglers produce half their body weight in food each day. This worm produced manure is called castings.
Make your worm bin then take the Zero Waste Pledge. With the help of Red Wigglers NYC will fulfill its Zero Waste Pledge: With the release of the One New York City Planby Mayor Bill De Blasio in April 2015, NYC committed to eliminating the need to send waste to landfills by the year 2030.
Worm Bin Materials (We have 10 bins to giveaway to the first 10 people who sign up to the workshop)
- 6 Qt. Clear Plastic Bin with Cover, Dimensions 13 5/8” L x 8 1/4” W x 4 7/8” H
- Bedding (recycled newspaper–do not use glossy pages)
- Red Wigglers (Eisenia fetida) from the Lower East Side Ecology Center
- Soil
- Food scraps
- Container of dechlorinated water. Chlorinated water will harm the worm’s skin. Fill the container with water 48 hours before you build your bin allowing the chlorine to evaporate.
Tools
- Battery powered drill
- Plastic tongs
- 1 cup measuring cup
- Water sprayer
Steps 1 – 9
- Drill holes at measured intervals around the upper rim of the lid to allow air to flow in and out of the bin. All living organisms need oxygen to survive. The first 10 attendees to sign-in to the workshop will receive a free bin setup.
- Tear the recycled newspaper into strips to make the bedding.
- Moisten the bedding. Water is a necessary ingredient for this living ecosystem to function. In NYC, our tapwater is chlorinated. Worms have sensitive skin and the chlorine can hurt them. Set out some water overnight for 24 hours and the chlorine will dissipate from the water making it safe for the worms. Once the ecosystem is established moisture will be produced by the decomposition of the organic material by millions of microorganisms resident in the bin and the worm production of castings. Worms will consume the bedding along with the food scraps.
- Place an inch of damp, not wet, bedding on the bottom of the bin. Sprinkle a pinch of soil on top of the bedding. Worms don’t have teeth and need grit for their gizzards to grind the food. The soil contains bacteria, fungi, and other microorganisms to inoculate the medium.
- Mix in a handful of leaf mold.
- Mix in handful of food scraps.
- Add a handful of worms.
- Cover with an inch of moist newspaper bedding.
- Place the lid on the bin. Snap it closed. Keep under light for 1-2 days until the worms acclimate to their new environment.
Maintaining a Healthy Worm – Human Ecosystem
- Keep the temperature between 32 and 90 degrees.
- If the bin becomes too wet, use dry bedding to replace the bedding that has been consumed.
- Feed your worms vegetable and fruit scraps. Avoid meats, bones, fish, heavily acidic foods such as grapefruits, and food scraps that have a high vinegar content. Worms can consume, without causing odors, lettuce, cabbage, carrot & potato peels, tea leaves and coffee grounds (with bags and filters). For a full list of the do’s and don’t’s of keep Red Wigglers and yourselves happy and healthy visit the NYC Compost Project’s “Indoor Composting with a Worm Bin” guide.
- Think of yourself as a critical member of a healthy expanding Red Wiggler ecosystem–which of course you are as you provide nourishment and harvest nutritious compost to nourish your houseplants, garden plants, and street trees.